

There are tons of Lightroom presets out there that you can purchase to give your photos a matte finish. And it’s no wonder! The soft velvety look of a matte effect can add a beautiful and timeless look to your images. But what if I told you that you didn’t have to spend a single penny of your hard earned dollars on matte presets? What if I told you that you could create the look yourself in one or two easy steps? I’m pretty sure you know where I’m going with this…
My go-to tool for creating matte in Lightroom is the tone curve. You’ll find it right under your basic panel in the develop module. And here’s what we’re going to do with it…
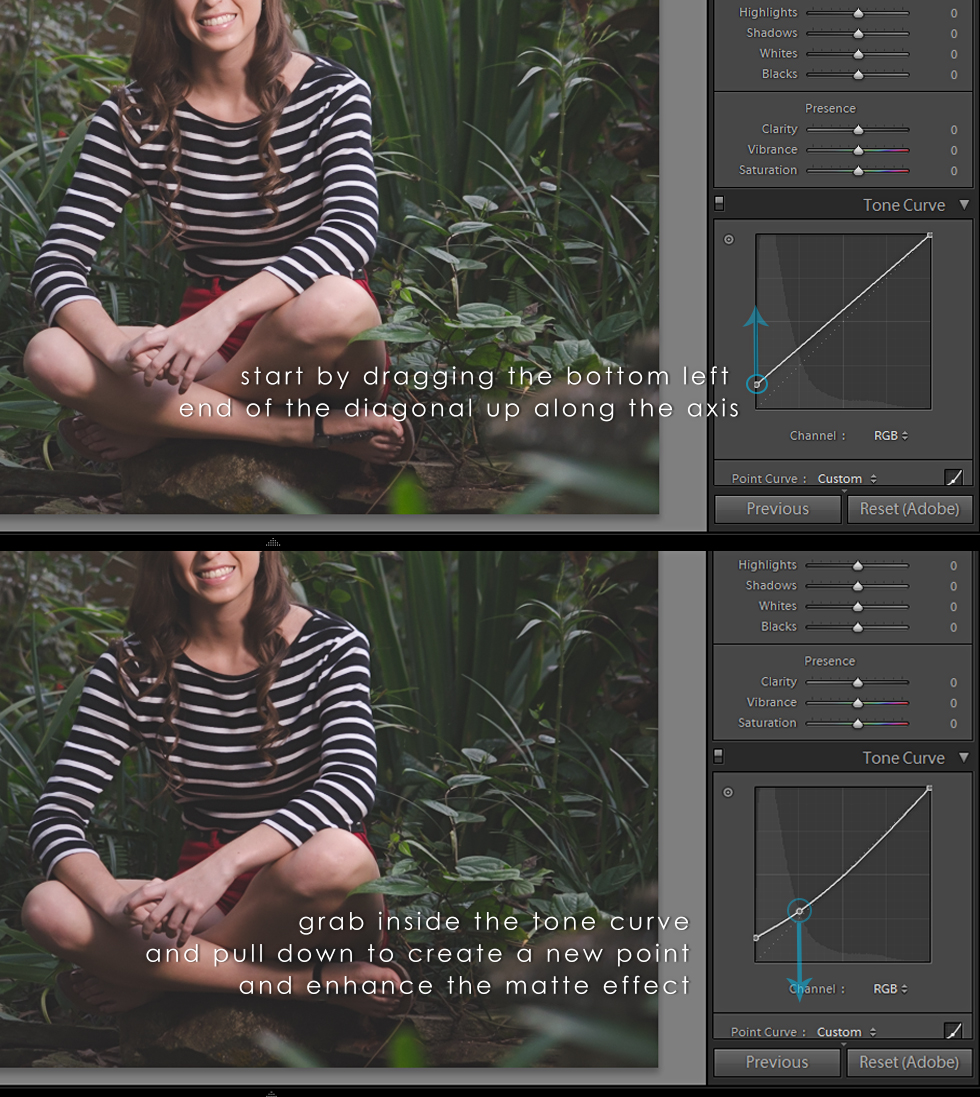
You’ll see that pulling the left end of the curve up too high will make your subject look as if she’s lost in a fog, and pulling your inner point on the curve too far can create some crazy effects. But you can play with the tone curve until you achieve the desired effect.
If you’re unsure if you like the look of your matte, use Lightroom keyboard shortcut [Y] to view the before and after until you get it just right.

And it’s seriously just that easy! Once you’ve mastered the matte, you might want to consider making a preset of your very own to save time on future editing. Not sure how to make a Lightroom preset? Keep an eye out for a tutorial coming soon!
Got questions? Leave them in the comments and I’ll be happy to answer:)

Thank you so much!
My pleasure! 🙂